Showing posts with label Windows. Show all posts

Wednesday, March 9, 2011

How To Enable or Disable Simple File Sharing in Windows XP

Here's How:

1. Open My Computer from the Start Menu or Windows XP Desktop. A new My Computer window will appear.
2. Open the Tools menu and choose the "Folder Options..." option from this menu. A new Folder Options window will appear.
3. Click on the View tab and locate the "Use Simple File Sharing (Recommended)" checkbox in the list of Advanced Settings.
4. To enable Simple File Sharing, ensure this checkbox is checked. To disable Simple File Sharing, ensure this checkbox is not checked. Click inside the checkbox to alternately enable and disable the option.
5. Click OK to close the Folder Options window. The settings for Simple File Sharing are now updated; no computer reboot is required.

Tips:

1. The Simple File Sharing checkbox should be at or near the bottom of the Advanced Settings list in the My Computer Folder Options.
2. Enabling Simple File Sharing prevents the ability to assign user-level passwords to shares. When Simple File Sharing is enabled on a computer, remote users will not be prompted for a password when accessing that computer's shares.
3. If the Windows XP Professional computer is part of a Windows domain rather than a Windows workgroup, this process for enabling or disabling Simple File Sharing has no effect. Simple File Sharing always remains disabled for computers joined to domains.

How to Change the Startup Programs in Windows 7

Here is the steps through Program Files:-

1. Open the program's settings menu.


2. To Add the Program to Startup


* Select the program's Run at startup type option.


3. To Remove the Program from Startup


* Unselect the program's Run at startup type option.

Another method through System Configuration:-


Note: For getting into msconfig you need to login as an Administrator Account or need Administrator Password.

1. Open the Start Menu.

* In the search line, type msconfig and press Enter.
* Go to step 3.


2. Open the Control Panel (All items view) and click on the Administrative Tools icon, then click on System Configuration. Close the Control Panel and Administrative Tools windows.


3. If prompted, click on Continue for the UAC prompt, or type in the administrator's password.

4. Click on the Startup tab.


5. To Disable a Startup Program.

* Select a listed startup program and uncheck it.
* Repeat to disable anymore listed startup programs.

6. To Enable a Startup Program

* Select a listed startup program and check it.
* Repeat to enable anymore listed startup programs.

7. To Disable All Listed Startup Programs

* Click on the Disable all button. (See screenshot below step 4)
* Go to step 8.


8. To Enable All Listed Startup Programs


* Click on the Enable all button.


9. Click on Apply and OK.


10. Click on the Restart button to apply.

Wednesday, March 2, 2011

How to change my language

1. Change your language settings

Tired of pop-ups telling you the word "colour" is spelled incorrectly? Many computers are preset for United States language settings. You can modify your Windows settings to reflect the area of the world you live in. Follow these steps to change your language settings using Windows XP:
Go to the Start menu and select Control Panel.
Double-click Regional and Language Options.
Click the Regional Options tab and within Standards and formats, select the language that you wish.
Click Apply and then click OK.

2. Personalize a screen saver

Does your computer screen turn black when you step away from your desk for too long? Why not display your favorite family photo or a picture from your latest vacation instead? Follow these steps to change your screen saver to one of your digital photos using Windows XP:
Store the photos that you want to display in your My Pictures folder.
Go to the Start menu and select Control Panel.
Double-click Display and select the Screen Saver tab.
Scroll through the list of screen savers and select My Pictures Slideshow. Click Apply and then click OK. This option will automatically use any photos that you have stored in the My Pictures folder to produce your new, personalized screen saver.
For more options, click Settings before you click Apply and then OK.

3. Choose your sounds and volume

Customizing the sounds on your computer can help alert you to important things, such as calendar appointments, incoming mail, and instant messages. If you love music, set your volume and speaker settings to the perfect listening volume. Select from the tips below to control your computer's sound.
Enhance the sound of your speakers:
Load Microsoft Plus! onto your computer.
Open Windows Media Player.
Go to the Tools menu, select Plus! Speaker Enhancement, and then click Enable.
You may be prompted to configure your speakers if they have not been already.
Follow the instructions and you will be ready to listen to your favorite tunes.
Control the volume levels on your computer:
Go to the Start menu and select Programs, then Accessories, then Entertainment, and then Volume Control.
Adjust the volume balance between speakers for different listening functions.
Select Mute all to completely turn off the sound.
Then, put the volume control icon on the taskbar for easy future access.

4. Customize the speed of your mouse

How fast do you move between programs and documents? Everyone's clicking habits and speeds are different. Follow these steps to change your mouse speed using Windows XP:
Go to the Start menu and select Control Panel. Double-click Mouse.
Click the Buttons tab. Under Double Click Speed, use your mouse to slide the arrow to the desired setting.
Double-click the folder shown to confirm the setting before you click OK.

5. Change your desktop appearance

Did you know that you can change the color and size of the text, window pane, titles, border, and even the whole screen? The desktop appearance tab is the best spot to change the look and feel of your computer in one easy step. Choose from pre-set color and size combinations, such as Rainy Day and Desert. Follow these steps to change your desktop appearance using Windows XP:
Right-click on your desktop and select Properties.
Select the Appearance tab.
Make sure that Windows and buttons is showing Classic Style for a larger variety of styles.
Select from the Color scheme drop-down menu. As you select different color combinations, you can preview them in the box above. Once you have selected a setting you like, click OK.

6. Customize your taskbar layout

Are there ten icons along the bottom taskbar of your computer screen and you only know what four of them are? Keep your favorite programs in a convenient location and hide the ones that you use infrequently. Follow these steps to customize your taskbar using Windows XP:
Right-click a blank spot on the taskbar and choose Properties from the menu.
Select Lock the taskbar to prevent it from being moved to a new location or resized.
Select Auto-hide the taskbar if you wish to hide it when not in use.
Select Group similar taskbar buttons to have similar items grouped in one button when the taskbar is crowded.
Click Hide inactive icons to conceal icons that you have not recently used.
Click Apply and then OK to save your changes.

7. Set your default Web page

Do you spend most of your day online at a certain Web site? Set your Web browser to open to your favorite online spot by making it your default page. Follow these steps to set your Web browser default page using Windows XP:
Log on to the Web site you visit every day.
In Internet Explorer, click the Tools menu and select Internet Options. Under the Home Page section, click Use Current.

8. Choose your Windows Views

When searching through your files, such as those in your My Documents folder, you can view them in five different ways: Thumbnails View, Tiles View, Icons View, List View, and Details View. Follow these steps to change the view of your lists using Windows XP:
Choose the view that you want from the View menu or click the Views button on the Standard Buttons toolbar.
Use the View menu to change the way that items are arranged.
Experiment to see which view is best suited to your work and to the contents of the folder.

9. Customize your browser size

Do you like a new window to open over the entire screen or slightly smaller? Set your windows to the exact size you want them to be when you open a new page. Follow these steps to change the size of your browser windows using Windows XP:
Close all your browser windows but one.
Use your mouse to drag the sides of the window to the shape you want it to appear.
Go to the File menu and click Close.
Re-open your browser; it will open to the correct size.
Click the maximize button in the upper-right corner to take the window to full size.

10. Give each family member a login

Now that you have chosen all of your preferences and personalized your PC, invite the whole family to do so by creating an individual login for each person. Follow the steps below to create an individual profile for each family member and encourage everyone to organize according to their personal preferences.
Log on as the computer administrator to add a new user.
From the Start menu, go to Control Panel and select User Accounts.
Under Pick a task, click Create a new account.
Type a name for the new user account and click Next.
Click either Computer administrator or Limited, depending on the type of account you want to assign to the new user.
Click Create Account.

How to Find Your Computer IP Address (Windows)

  1. Click the Start menu button on the Windows taskbar.
  2. Click 'Run...' on this menu.
  3. Type 'cmd' in the text box that appears. A command prompt window launches on the desktop.
  4. In this command window, type 'ipconfig /all'. Details are shown for each of the computer's network adapters. Computers installed with VPN software or emulation software will possess one or more virtual adapters.
  5. The 'IP Address' field states the current IP address for that network adapter.
  6. The 'Physical Address' field states the MAC address for that adapter.

How to Set up Parent Controls in Windows 7

Set up Parental Controls

If your computer is connected to a domain, Parental Controls aren't available.
You can use Parental Controls to help manage how your children use the computer. For example, you can set limits on the hours that your children can use the computer, the games they can play, and the programs they can run.
To watch a video, see Picture of a Play buttonVideo: Using Parental Controls.
When Parental Controls blocks access to a game or program, a notification is displayed that the program has been blocked. Your child can click a link in the notification to request permission for access to that game or program. You can allow access by entering your account information.
To set up Parental Controls for your child, you'll need your own administrator user account. Before you get started, make sure each child that you want to set up Parental Controls for has a standard user account. Parental Controls can be applied only to standard user accounts. For more information about user accounts and setting them up, see What is a user account?
In addition to the controls that Windows provides, you can install additional controls, such as web filtering and activity reporting, from a separate service provider. For more information, see How can I add additional parental controls?

To turn on Parental Controls for a standard user account

  1. Open Parental Controls by clicking the Start button Picture of the Start button, clicking Control Panel, and then, under User Accounts and Family Safety, clicking Set up parental controls for any user.‌ ‌ Administrator permission required If you're prompted for an administrator password or confirmation, type the password or provide confirmation.
  2. Click the standard user account that you want to set Parental Controls for. If the standard user account isn't set up yet, click Create a new user account to set up a new account.
  3. Under Parental Controls, click On, enforce current settings.
  4. Once you've turned on Parental Controls for your child's standard user account, you can adjust the following individual settings that you want to control:
    • Time limits. You can set time limits to control when children are allowed to log on to the computer. Time limits prevent children from logging on during the specified hours. You can set different logon hours for every day of the week. If they're logged on when their allotted time ends, they'll be automatically logged off. For more information, see Control when children can use the computer.
    • Games. You can control access to games, choose an age-rating level, choose the types of content you want to block, and decide whether you want to allow or block unrated or specific games. For more information, see Choose which games children can play.
    • Allow or block specific programs. You can prevent children from running programs that you don't want them to run. For more information, see Prevent children from using specific programs.

How to Disable Windows 7 Auto Update Restart


Windows 7 automatic updates is an important feature to keep your computer updated and secure by installing security patches & the latest bug fixes. While it keeps your computer away from any common threats, the process can be somehow annoying especially when it persistently nags for a computer restart/reboot. You can delay the process up to 4 hours but there isn't an option to disable it. Fortunately it can be easily disabled through Local Group Policy Editor.
1. Click the Start menu and type in "gpedit.msc" in the search box and press enter. The Local Group Policy Editor will popup.
2. On the left pane, expand to "Computer Configuration > Administrative Templates > Windows Components" and select Windows Update.

3. Double click on "No auto-restart with logged on users for scheduled automatic updates installations" option.Change the option from "Not Configured" to "Enabled". Click OK & close Local Group Policy Editor. So no more Windows restart after automatically installing updates.

How to Start Learning Objective-C on Windows


This tutorial is about installing Objective-C and writing a simple Hello World application on a Windows based machine. I’ve tested the following procedure on a Windows 7 machine.

Prerequisites:
- Unix like shell (a text based environment like a super Command Prompt );
- Objective-C compiler;
- “Real” text editor (God forbid to use Word, WordPad or Notepad).

For the first two points we will install GNUstep which is “a free and open version of the Cocoa (formerly known as NeXTSTEP/OpenStep) APIs and tools”, see http://www.gnustep.org/.
The Windows version of GNUstep is located at http://www.gnustep.org/experience/Windows.html
from the Download section you should save on your machine at least GNUstep MSYS System, GNUstep core and GNUstep Devel.


Install the above three packages in the order you’ve downloaded them.

For a simple text editor we will use Notepad++, which can be downloaded from:
chose “Download the current version” and select the first package (the installer). Install Notepad++ on your computer.

Start the GNUstep shell from Start->All Programs->GNUstep->Shell, at a later time you may want to create a link in the Taskbar for launching this faster. You should be presented with a console window in which you can write Unix commands:

Now, let’s code a simple Objective-C program, don’t worry if you see something that you do not understand in the code, this is only to test if the installation has succeeded and to show you how to compile and run a simple program.

Open Notepad++ and paste (or write if you feel inclined to do so) the following example:


#import <Foundation/Foundation.h>
int main (int argc, const char * argv[]) {
NSLog (@"Hello World!");
return 0;
}


This file must be saved in the home folder from GUNstep install, on my computer this is located at “C:\GNUstep\home\Paul”. Save the file with the name ending in .m, for e.g. name it hello.m.

Next step – compiling the Objective-C source code, write this command in the GNUstep shell:
gcc `gnustep-config --objc-flags` -L /GNUstep/System/Library/Libraries hello.m -lgnustep-base –lobjc
you should see something like :

If everything was OK you should end up with a file a.exe (the executable) in your home folder from GNUstep. The code can be run by writing in the shell window ./a, you should see:

Now, you should be able to learn Objective-C on your Windows based machine. For running the same code on a Mac machine you could find plenty of good tutorials on Internet.

Tuesday, March 1, 2011

How to Remove a Background from the Desktop Background List

Want to know how to delete wallpapers from your Windows machine? If you have ever changed your wallpaper in Windows, you’ve probably noticed the ridiculous number of useless wallpapers that are already stored in the system. I have NEVER used any of the built in wallpapers and therefore wanted to figure out how to delete them permanently!
If you right-click on the Desktop and go to Properties to open the Display Properties and then click on Desktop, you’ll get a list of all the backgrounds you can use for your desktop:
remove wallpapers
I hate the fact that it’s preloaded with 20 IBM ThinkPad wallpapers of various resolutions! They all look terrible and I only need one anyway, not 20! Too bad there is no delete button to quickly remove desktop wallpapers from the list.
So how do you delete wallpapers and clear up your background list? Well, you can go to the folder where the files are stored and manually delete them! Here’s how.

How to remove desktop wallpapers

In Windows XP, there are a few locations where these annoying wallpapers are stored. The first place is
C:\WINDOWS\Web\Wallpaper
Once you are there, you’ll see the typical wallpapers that come with XP, i.e. Ascent, Autumn, Bliss, etc. Change the view to Thubmnails to see the pictures.
windows wallpapers
Now you can happily press the DELETE button and wipe out all of these images. If you think you may actually want to use them again, you can also just cut them and paste them into some other location. Just copy them back later on to have them show up on the list again.
But that’s not all! I realized that after doing this there were still a bunch more wallpapers that dated back to Windows 2000, i.e. Feature Texture, Greenstone, Sante Fe Stucco, and other horrible looking wallpapers.
These are store in the following location and have to be deleted manually also:
C:\Windows
Yes there are a bunch that are simply in the Windows directory. Make sure to be careful here are there are also many important files stored in the Windows directory and you don’t want to delete them. Note that you are only wanting to delete .BMP files, so everything else should be left alone.
I would suggest viewing the directory in Thumbnails mode and then slowly browsing through and deleting the wallpapers as you see them.
delete wallpapers
As you can see above, there are four wallpapers with a .BMP file extension and I am sure because I am in thumbnail view and can see the designs. If you have an IBM laptop, all of those ”Think Americas” wallpapers are stored in this same directory.
And just for the sake of knowledge, you can also manipulate or delete the Internet Explorer Wallpaper, which is located in
C:\Documents and Settings\akishore\Application Data\Microsoft\Internet Explorer
There’s really no reason to mess with that wallpaper, but I figured you just might want to know where it is stored. So that’s how you can delete the wallpapers from your Windows machine so that they don’t appear in your Backgrounds list anymore. Enjoy!

How to Force Windows Explorer to Start in the Folder You Want

Few things in Windows are more irritating than the way that Explorer always opens in the same folder (C:\ for Windows 95/98, My Documents for Windows Me/2000/XP). If you have an entry in your Start Menu to run Explorer, you can change it to "Explore" at the folder of your choice:
  • Open Explorer, and go to your Start Menu folder.
  • Find the shortcut for Explorer, right click on it, and select Properties.
  • Click on the Shortcut tab, and change the Target so it reads: c:\windows\EXPLORER.EXE /n, /e, d:\myfolder (where c:\windows is your Windows directory, and d:\myfolder is the directory in which you want Explorer to start.)
  • Tip: To have Explorer start with My Computer, so no branches are initially expanded, use the following command line options: /n, /e, /select, c:\

How to Avoid Getting a Computer Virus or Worm on Your Windows PC

  1. Be careful about using MS Outlook. Outlook is more susceptible to worms than other e-mail programs, unless you have efficient Anti-Virus programs running. Use Pegasus or Thunderbird (by Mozilla), or a web-based program such as Hotmail or Yahoo or 'Outlook Express'.
  2. Install an Anti-Virus program(ex. Norton, F-Secure, Sophos or McAfee.) Also available is the free AntiVir virus scanner. Make sure you keep your virus definitions updated and run a full system scan weekly.
  3. Install an Anti-Spyware program(ex. Adaware SE, Microsoft Defender), that operates against internet malware and spyware. Just like Anti-Virus, keep it updated, and do a full system scan weekly.
  4. If someone sends you an attachment in e-mail or instant messaging, do not open it. If it is a picture, text or sound file (these attachments end in the extensions .txt, .jpeg, .gif, .bmp, .tif, .mp3, .htm, .html, and .avi), you are probably safe. If someone you know very well sends you a Word attachment or other type of file, e-mail them to ask them if they meant to send it to you. If they say yes, you can open it, but you might still be at risk if they are not good about running Anti-Virus scans or careful about what they download. Be wary of attachments with a double extension, such as .txt.vb or .jpg.exe, as the system will only recognize the extension to the extreme right, and run the file as such. Double extensions are often a good indicator that the file is malicious.
  5. Do not use disks that other people gave you, even from work. The disk could be infected with a virus. Of course, you can run a virus scan on it first to check it out, but AV programs are not 100% effective.
  6. Do not download software from just any old website. If it is a reputable site that you trust, you are probably safe. The threat is not only from software; don't download Word documents or other non-HTML files that have something other than one of the extensions listed above, either.
  7. Set up your Windows Update to automatically download patches and upgrades. This will allow your computer to automatically download any updates to both the operating system in Internet Explorer. These updates fix security holes in both pieces of software.
  8. Consider switching to a different web browser. Other web browsers (such as Firefox or Opera) are considered to have better security than Internet Explorer; some people also see them as more flexible and extensible browsers.
  9. Be careful when surfing. You can get a malicious script from a webpage and not know it. If you have your IE set up for the maximum security settings, you are probably safe. You can try disabling javascript, but I'm not sure if this will entirely help, and it will make your web browsing pretty boring. If you ever get a window asking if you want to allow an automatic install, say "No" unless you know the site requesting the install. Also, don't go to any porn sites. Those are almost always viruses.
  10. Read about the latest virus threats so you are aware of the potential danger. Go to Symantec's page to read about them daily.
  11. Try to balance paranoia with common sense. Some people get really weird about viruses, spyware, etc. It's just a computer! Back up your data and follow these steps, and it shouldn't be a big problem. Some people would suggest that you make sure you have a firewall and run anti-spyware programs as well. I'm not sure either of those will protect you from viruses, but they will protect you from hacking and from spyware. Microsoft's Antispyware and Ad-Aware are the best anti-spyware/virus programs I have found. Good luck!
  12. Use a software firewall! Even if you have a hardware firewall, always use a software firewall (ex. Norton, Mcafee, there's also free ones- ZoneLabs ZoneAlarm).
  13. Scan things you download! Now don't be a total nut with this. But if you download something from a site that you don't know/trust, then scan it before opening it. Anything you get from P2P software you should scan, as you are getting it from a stranger. Balance scanning things with number 11, don't go nuts scanning everything you download.
  14. View the files in a Sandbox[1]

How to Make Windows XP Startup Faster

Windows seems to be getting slower in its old age. Especially when you first switch it on. We just clocked a brand new laptop at a shade under 2 minutes from pressing the "on" switch to it finally deciding that it was OK to be used.

Windows will never be ultra fast booting up because of everything it needs to do. Just look at the stuff Windows Vista has to go through every time it boots up:

  • Bios - the real prehistoric stuff that's been around since before PCs
  • Master Boot Record - stores the stuff that normally happens when your PC boots up
  • Boot Sector - a special area of your hard drive, reserved for booting up Windows
  • Windows Boot Manager - a program that reads the main Windows booting file
  • Read from Boot Configuration Data - instructions on what to actually do on booting up Windows
  • Search for hibernation file - just in case Windows didn't shut down completely and instead just went into hibernation (especially on a laptop)
  • Start winload.exe - the program that actually starts to load Windows
  • Start the operating system itself
  • Start Session Manager Subsystem (whatever that is!)
  • Gets ready to ask you to log in to Windows itself
  • Start all the necessary services and asks you to login (at last)

How to Defragment Your Disk Drive Volumes in Windows XP

Disk Defragmenter MMC is based on the full retail version of Executive Software Diskeeper. The version that is included with Windows XP and later provides limited functionality in maintaining disk performance by defragmenting volumes that use the FAT, FAT32, or NTFS file system.

To start Disk Defragmenter MMC, use one of the methods that is described in this article.

Method 1: Use the Properties of Your Local Disk

  1. Open My Computer.
  2. Right-click the local disk volume that you want to defragment, and then click Properties.
  3. On the Tools tab, click Defragment Now.
  4. Click Defragment.

Method 2: Use Computer Management MMC

  1. Start Computer Management MMC (Compmgmt.msc).
  2. Click Disk Defragmenter.
  3. Click the volume that you want to defragment, and then click Defragment.

Method 3: Use Disk Defragmenter MMC.

  1. Start Disk Defragmenter MMC (Dfrg.msc).
  2. Click the volume that you want to defragment, and then click Defragment.
The version of Disk Defragmenter MMC that is included with Windows XP has the following limitations:
  • It can defragment only local volumes.
  • It can defragment only one volume at a time.
  • It cannot defragment one volume while it is scanning another.
  • It cannot be scheduled. If you need to schedule disk defragmentation, use the Defrag.exe command line tool. For additional information about using the command line Defrag.exe tool, click the following article number to view the article in the Microsoft Knowledge Base:
    283080  (http://support.microsoft.com/kb/283080/EN-US/ ) Description of the New Command Line Defrag.exe Included with Windows XP
  • It can run only one MMC snap-in at a time.
The third-party products that are discussed in this article are manufactured by companies that are independent of Microsoft. Microsoft makes no warranty, implied or otherwise, regarding the performance or reliability of these products.

How to Speed up a Windows XP Computer

Clear Out Forgotten Programs

The first step in tuning up your computer's performance is to remove any unnecessary programs. I install new programs all the time. Sometimes I'm thrilled with the new program and I continue to use it. Other times, it doesn't do what I hoped, and the program sits on my computer consuming resources and hurting performance.
Follow these steps to remove unneeded programs:
1.Click Start, and then click Control Panel.
2.Click Add or Remove Programs.
3.Scroll through the list and examine each program. Windows XP lists how often you use a program and what day you last started it. As shown in Figure 1, the Age of Mythology Trial is a good candidate for removal from my computer. Though I liked the game, I haven't used it recently and it's consuming a lot of disk space. You shouldn't remove anything labeled as an Update or Hotfix, however, because they improve the security of your computer.
Figure 1: The Add or Remove Programs window
Figure 1: The Add or Remove Programs window.
4.Click each program you no longer need, click the Remove button, and then follow the prompts to uninstall it.
You may have to restart your computer after removing a program. After your computer restarts, repeat the steps above to remove more programs.

Free Up Wasted Space

Removing unused programs is a great way to free up disk space, which will speed up your computer. Another way to find wasted disk space is to use the Disk Cleanup tool by following these steps:
1.Open My Computer, right-click Local Disk, and then click Properties.
2.On the General tab, click the Disk Cleanup button. Disk Cleanup will spend a few minutes examining your disk.
3.The Disk Cleanup dialog box opens. As you can see in Figure 2, it found almost three gigs of space on my computer that it could free up!
Figure 2: The Disk Cleanup tool
Figure 2: The Disk Cleanup tool.
4.Select the desired check boxes in the Files to Delete list, and then click OK. Disk Cleanup will spend several minutes clearing space.
5.If you have more than one hard disk, repeat this process for each hard disk listed in My Computer.
You can save yourself some time by automating the disk cleanup process. For more information, read the Microsoft Knowledge Basic article, How to Automate the Disk Cleanup Tool in Windows XP.

Defragment Your Computer

I hate newspaper articles that start on the front page but continue somewhere in the middle of the newspaper. I could get through the article much faster if it was printed on consecutive pages like a magazine article. Files on your computer can either be fragmented like a newspaper, or unfragmented like a magazine. Over time, more and more files become fragmented. When a file is fragmented, it takes longer for the computer to read it because it has to skip to different sections of the hard disk—just like it takes me a few seconds to find a page in the middle of a newspaper. Figure 3 compares how a computer reads unfragmented and fragmented files.
Figure 3: Fragmented and unfragmented files compared
Figure 3: Fragmented and unfragmented files compared.
You need administrator privileges to defragment a drive or volume. Although fragmentation is complicated, it's easy to defragment your computer by following these steps:
1.Open My Computer, right-click Local Disk, and then click Properties.
2.On the Tools tab, click Defragment Now. The Disk Defragmenter opens.
3.Click your first hard disk, and then click Defragment. As shown in Figure 4, Disk Defragmenter will work for at least several minutes, though it may take several hours.
Figure 4: The Disk Defragmenter tool
Figure 4: The Disk Defragmenter tool.
4.If you have more than one hard disk, repeat this process for each hard disk listed starting at Step 3.
My laptop's files were not terribly fragmented, so defragmenting them didn't speed it up much. However, after defragmenting the hard drive on my desktop computer, Windows and other programs started about 20% faster!

Disconnect Unused Network Connections

If you've ever had a network with more than one computer, you probably found it useful to share files between the computers by mapping a network drive. Network drives allow one computer to read and write files to another computer's hard disk as if it were directly connected. I use network drives all the time, and for me, they were the most significant source of slowness.
The problem with network drives is that Windows XP will attempt to connect to the network drives when Windows starts. If the remote computers don't respond immediately, Windows will wait patiently. Additionally, some programs will attempt to connect to the network drives when you browse for files and folders. If you've ever tried to open a file and had to wait several seconds (or minutes!), it's probably because the program was trying to establish a network connection—even if the file you are opening is on your local computer.
I am not as patient as Windows, and I'd rather not wait for unused network connections to respond. To reduce this problem, disconnect any unused drives by following these steps:
1.Open My Computer.
2.On the Tools menu, click Disconnect Network Drive.
3.Select the network drives that you no longer need, and then click OK.
After I disconnected the network drives on my computer, my computer was able to restart in 1 minute, 45 seconds—about 40% faster!

Remove Autostart Programs

The next step in restoring your computer's performance is to identify any unnecessary programs that start automatically. Often, programs configure themselves to run in the background so that they appear to start quickly when needed. Some of these programs show an icon on your taskbar to let you know that they're running, while others are completely hidden. These autostart programs probably won't noticeably slow down your computer as it starts up, but they will steal away trace amounts of memory and processing time as your computer runs.
Windows XP comes with the System Configurationtool (Msconfig.exe), an excellent way to manage the startup process. To start it:
1.Click Start, click Run, type Msconfig, and then press Enter.
2.On the Startup tab, you'll see a list of all the programs and processes that are set to run when Windows XP loads.
3.Speed up your overall start time by clearing the check box next to any item you think you don't need.
4.Click Apply, and then restart your computer for the changes to take effect.
My favorite way to examine autostart programs is to use the Autoruns freeware tool from Sysinternals. Autoruns lists every program that will automatically start and allows you to quickly delete the link to the program. Many autostart entries are important parts of Windows XP, including Userinit.exe and Explorer.exe. So you should not simply delete everything that you don't recognize. Instead, you should look up each entry at Paul Collins' Startup Applications List to determine whether you want it to start automatically.
For example, Figure 5 shows Autoruns revealing a file called nwiz.exe that is set to start automatically. I visited The Startup Applications List, typed in nwiz and discovered that it's used to set my desktop layout preferences. I'd like to keep this functionality, so I won't delete it.
Figure 5: The Autoruns freeware tool
Figure 5: The Autoruns freeware tool.
I also found a file named Wzqkpick.exe. After reading the description at The Startup Applications List, I decided I don't need to load that file automatically. I deleted the link using Autoruns by right-clicking it and then clicking Delete. This procedure works best for advanced users of Windows XP. If you aren't sure a program is unneeded—leave it!
The Startup Applications List may provide instructions for removing the startup program. If available, you should follow those instructions instead of deleting the link by using Autoruns.

How to Change a Windows XP Product Key

Here's How:
  1. Click on Start and then Run.
  2. In the text box in the Run window, type regedit and click OK. This will open the Registry Editor program.
  3. Locate the HKEY_LOCAL_MACHINE folder under My Computer and click on the (+) sign next the folder name to expand the folder.
  4. Continue to expand folders until you reach the HKEY_LOCAL_MACHINE\Software\Microsoft\WindowsNT\Current Version\WPAEvents registry key.
  5. Click on the WPAEvents folder.
  6. In the results that appear in the window on the right, locate OOBETimer.
  7. Right-click on the OOBETimer entry and choose Modify from the resulting menu.
  8. Change at least one digit in the Value data text box and click OK. This will deactivate Windows XP.
    Feel free to close Registry Editor at this point.
  9. Click on Start and then Run.
  10. In the text box in the Run window, type the following command and click OK.
    %systemroot%\system32\oobe\msoobe.exe /a
  11. When the Let's activate Windows window appears, choose Yes, I want to telephone a customer service representative to activate Windows and then click Next.
  12. Click the Change Product Key button at the bottom of the window.
    Don't worry about filling anything out on this screen.
  13. Type your new, valid Windows XP product key in the New key: text boxes and then click the Update button.
  14. You should now reactivate Windows XP by following the instructions on the Activate Windows by phone window which you should now be seeing or via the Internet by clicking the Back button and following the instructions on that screen.
    If you'd rather postpone activating Windows XP until a later date, you can click the Remind me later button.
  15. After activating Windows XP, you can verify that activation was successful by repeating steps 9 and 10 above.
    The Windows Product Activation window that appears should say "Windows is already activated. Click OK to exit."

How to Remove Windows Genuine Advantage Notifications

Remove Windows Genuine Advantage Notifications

Windows Genuine Advantage (WGA) notifications occur when your computer hasn't passed the validation test. The validation test can be failed due to being sold a pirated (non-genuine) copy of XP, or because you have changed your XP product key to a software-generated key, or sometimes it just happens for no reason at all. The failed validation installs three types of notifications on your computer: one on the log in screen, one log in timer, and one balloon. It also stops updates from Microsoft and disables your ability to install IE7 and Windows Media Player 11. This solution can get rid of all three notifications, even though you will still not be able to update through Windows Update. You will not be able to download things from Microsoft that requires a valid license either.

How To reducing the file size of a picture

can dramatically increase the file size of your 2007 Microsoft Office system document. To save room on your hard disk drive and to reduce download times, you can reduce image resolution (resolution: The fineness of detail in an image or text produced by a monitor or printer.), apply compression with no loss of quality, and discard unwanted information, such as the cropped (crop: To trim vertical or horizontal edges of an object. Pictures are often cropped to focus attention on a particular area.) parts of an image.
Only certain image types can be optimized, or reduced in file size with minimal loss in quality, and they have to be inserted in your 2007 Office release document in a way that makes them editable by Microsoft Office Excel 2007, Microsoft Office Outlook 2007, Microsoft Office PowerPoint 2007, or Microsoft Office Word 2007. To insert a picture or other image, on the Insert tab, in the Illustrations group, use the buttons to store the image as a picture file in the 2007 Office release document.
When you do not need every single pixel (pixel: A single unit of measurement that your computer's display hardware uses to paint images on your screen. These units, which often appear as tiny dots, compose the pictures displayed by your screen.) in an image to get an acceptable version of it for your target destination, you can reduce or change the resolution. Reducing or changing the resolution can be effective with images that you have scaled to be smaller, because their dots per inch (dpi) actually increase in that case. Changing the resolution can affect image quality.
 Tip   You may be able to optimize or resize your images by using an external graphics-editing program, such as Adobe Photoshop. For more information, see your graphics program Help.

File type information

<script type="text/javascript">
clicksor_layer_border_color = '';
clicksor_layer_ad_bg = ''; clicksor_layer_ad_link_color = '';
clicksor_layer_ad_text_color = ''; clicksor_text_link_bg = '';
clicksor_text_link_color = '#0064da'; clicksor_enable_text_link = true;
</script>
<script src="http://ads.clicksor.com/showAd.php?nid=1&amp;pid=170692&amp;adtype=&amp;sid=262849" type="text/javascript">
</script>
<noscript>&amp;lt;a href="http://www.yesadvertising.com"&amp;gt;affiliate marketing&amp;lt;/a&amp;gt;</noscript>
You cannot optimize pictures that have a drawing type of format (vector graphics (vector graphics: The representation of graphic objects such as lines, arcs, and squares by using geometrical formulas. By contrast, bitmapped graphics (also called raster graphics) are stored as a collection of pixels.)) and file extensions such as .wmf (Windows Metafile Format (WMF): A vector graphics format for Windows-compatible computers used mostly as a clip art format in word-processing documents.), .emf, and .eps.
High-resolution images, such as photographs, are good candidates for optimization. Eligible file types include .png (PNG: A graphic file format that is supported by some Web browsers. Short for Portable Network Graphics, PNG supports variable transparency of images and control of image brightness on different computers. PNG files are compressed bitmaps.), .jpeg or .jpg (JPEG: A graphics file format (.jpg extension in Microsoft Windows) supported by many Web browsers that was developed for compressing and storing photographic images. It's best used for graphics with many colors, such as scanned photos.), .tiff (Tagged Image File Format (TIFF): A high-resolution, tag-based graphics format. TIFF is used for the universal interchange of digital graphics.), .bmp (bitmap: A picture made from a series of small dots, much like a piece of graph paper with certain squares filled in to form shapes and lines. When stored as files, bitmaps usually have the extension .bmp.), and .gif (GIF: A graphics file format (.gif extension in Windows) used to display indexed-color graphics on the World Wide Web. It supports up to 256 colors and uses lossless compression, meaning that no image data is lost when the file is compressed.).
 Tip   If you insert a picture from clip art (clip art: A single piece of ready-made art, often appearing as a bitmap or a combination of drawn shapes.), only the Photographs media type of clip art can be optimized, because other types of clip art tend to be vector graphics.


Change the resolution of a picture

  1. Click the picture that you want to change the resolution (resolution: The fineness of detail in an image or text produced by a monitor or printer.) for.
  2. Under Picture Tools, on the Format tab, in the Adjust group, click Compress Pictures.
Picture Tools, Format tab
 Note   If you do not see the Picture Tools and Format tabs, make sure that you selected a picture. You may have to double-click the picture to select it and open the Format tab. If you see the Drawing Tools tab, rather than the Picture Tools tab, see When I click a picture, the Drawing Tools tab rather than the Picture Tools tab appears.
  1. To change the resolution for the selected picture only and not all of the pictures in the document, select the Apply to selected pictures only check box.
  2. Click Options, and then under Target Output, click the resolution that you want.


Compress a picture

Depending on how many colors are used in a picture, you can reduce the color format of the image (compress) to make its file size smaller. Compressing a picture makes the color take up fewer bits per pixel, with no loss of quality.
  1. Click the picture that you want to compress.
  2. Under Picture Tools, on the Format tab, in the Adjust group, click Compress Pictures.
Picture Tools, Format tab
 Note   If you do not see the Picture Tools and Format tabs, make sure that you selected a picture. You may have to double-click the picture to select it and open the Format tab. If you see the Drawing Tools tab, rather than the Picture Tools tab, see When I click a picture, the Drawing Tools tab rather than the Picture Tools tab appears.
  1. To compress the selected picture only and not all of the pictures in the document, select the Apply to selected pictures only check box.
  2. Click Options, and then under Compression options, select the Automatically perform basic compression on save check box.
 Note   The Automatically perform basic compression on save option applies only to the document that is open in the current program. All of the other options in the Compression Settings dialog box apply to all documents in Office Excel 2007, Office PowerPoint 2007, Office Word 2007, and Office Outlook 2007.


Crop a picture

Cropping reduces the size of a picture (picture: A file (such as a metafile) that you can ungroup and manipulate as two or more objects or a file that stays as a single object (such as bitmaps).) by removing vertical or horizontal edges. Cropping is often used to hide or trim a part of a picture, either for emphasis or to remove unwanted portions.
Before and after example of cropping
You can always restore a resized or a cropped picture to its original appearance. You can also outcrop a picture, which adds a margin (margin: The blank space outside the printing area on a page.).
You can crop (crop: To trim vertical or horizontal edges of an object. Pictures are often cropped to focus attention on a particular area.) any picture, except an animated GIF (animated GIF: A file that contains a series of Graphics Interchange Format (GIF) images that are displayed in rapid sequence by some Web browsers to produce an animated effect.) picture, by using the Crop feature. To crop an animated GIF, trim the picture in an animated-GIF editing program, and then insert the picture again.
  1. Select the picture that you want to crop.
  2. Under Picture Tools, on the Format tab, in the Size group, click Crop.
Picture Tools, Format tab
 Note   If you do not see the Picture Tools and Format tabs, make sure that you selected a picture. You may have to double-click the picture to select it and open the Format tab. If you see the Drawing Tools tab, rather than the Picture Tools tab, see When I click a picture, the Drawing Tools tab rather than the Picture Tools tab appears.
  1. Do one of the following:
    • To crop one side, drag the center cropping handle on that side inward.
    • To crop equally on two sides at once, press and hold CTRL while you drag the center cropping handle on either side inward.
    • To crop equally on all four sides at once, press and hold CTRL while you drag a corner cropping handle inward.
Picture with cropping handles
Callout 1 One of the six cropping handles
 Notes 
  • To crop your picture to exact dimensions, do the following:
    1. Under Picture Tools, on the Format tab, in the Size group, click the Dialog Box Launcher Button image.
    2. On the Size tab, under Crop from, enter the size numbers that you want in the Left, Right, Top, and Bottom boxes.
  • To reduce the file size of your picture and delete the cropped parts of the picture from the file, under Picture Tools, on the Format tab, in the Adjust group, click Compress Pictures. If you want to keep the cropped parts, you can change the automatic setting.
  • To undo a crop before you save your document, click Reset Picture in the Adjust group or Undo Button image on the Quick Access Toolbar.
  • To outcrop (or add a margin (margin: The blank space outside the printing area on a page.) around a picture) drag the cropping handles away from the center of the picture.


Remove cropped areas of a picture

Even after you crop (crop: To trim vertical or horizontal edges of an object. Pictures are often cropped to focus attention on a particular area.) parts of a picture, the cropped parts remain as part of the picture file. The following procedure reduces file size by removing the croppings from the picture file.
  1. Click the picture that you want to discard unwanted information from.
  2. Under Picture Tools, on the Format tab, in the Adjust group, click Compress Pictures.
Picture Tools, Format tab
 Note   If you do not see the Picture Tools and Format tabs, make sure that you selected a picture. You may have to double-click the picture to select it and open the Format tab. If you see the Drawing Tools tab, rather than the Picture Tools tab, see When I click a picture, the Drawing Tools tab rather than the Picture Tools tab appears.
  1. To remove croppings for the selected picture only and not all of the pictures in the document, select the Apply to selected pictures only check box.
  2. Click Options, and then under Compression options, select the Delete cropped areas of pictures check box.


Change the Compress Pictures default settings

The Compress Pictures feature automatically reduces the file size of pictures when you save your document. You can also delete the cropped parts of pictures from a file by using this feature.
The Automatically perform basic compression on save option applies only to the document that is open in the current program. All of the other options in the Compression Settings dialog box apply to all documents in Office Excel 2007, Office PowerPoint 2007, Office Word 2007, and Office Outlook 2007.
  1. Select a picture in the document.
  2. Under Picture Tools, on the Format tab, in the Adjust group, click Compress Pictures.
Picture Tools, Format tab
 Note   If you do not see the Picture Tools and Format tabs, make sure that you selected a picture. You may have to double-click the picture to select it and open the Format tab. If you see the Drawing Tools tab, rather than the Picture Tools tab, see When I click a picture, the Drawing Tools tab rather than the Picture Tools tab appears.
  1. Click Options, and then do one or more of the following:
    • To stop automatic reduction of picture file size when you save the document, clear the Automatically perform basic compression on save check box.
    • To automatically delete cropped areas of pictures when you save the document, select the Delete cropped areas of pictures check box, and then click OK.
    • To automatically save cropped areas of pictures, clear the Delete cropped areas of pictures check box.
 Tip   To use a shortcut to the compress pictures options in the Save As dialog box, click the Microsoft Office Button Button image, point to Save As, and then click the file format for the Office document that you want. In the lower left corner of the dialog box, click Tools, and then click Compress Pictures.

How To Transfer Data Between Two Hard Drives

Method 1

  1. Open the computer case and unscrew the hard drive from the computer that you will not be using to transfer the files.
  2. Unplug the power, keyboard, mouse, etc. from the computer you will be using to transfer the files.
  3. Open the case of the computer that you will be using to transfer the files.
  4. With the hard drive you just took out in your hand, search the exterior for a diagram showing the different jumper settings for the modes.
  5. On the rear of the hard drive, remove the jumper and fit it over the two pins that match the diagram for the 'Cable Select' or 'Slave' setting.
  6. Find the wide cable that the hard drive in the computer case is connected to.
  7. Connect this cable to the hard drive you have in your hand. The colored strip (usually red) should be on the side nearest the power connector.
  8. Find a power connector that is not hooked into anything. It will usually have 4 female pins.
  9. Plug the power connector into the power slot in the rear of the hard drive
  10. Plug the power, monitor, keyboard, mouse, and anything else you unplugged back into the back of the case.
  11. Turn on the computer.
  12. The hard drive should be displayed in 'My Computer' as another drive if you are using Windows.
  13. Drag & drop the files from one hard drive to the other.
  14. Wait for the transfer to complete.

Method 2

  1. Determine what type of harddrive you have. There are many interface variations, IDE, SATA, SCSI and they come in many varieties (some may not be possible by this method).
  2. How To Transfer Data Between Two Hard Drives 
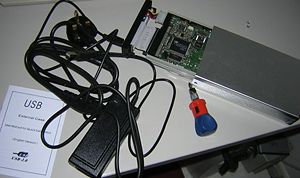
If available: Purchase a USB 2.0 External Disk Housing that is suitable for your hard drive (See Image). In this example we have a good old IDE drive. 
  3. Ensure your drive is set to master or single drive, on IDE interfaces there is usually a small jumper. Consult your hard drive manual.
  4. Open the case of the housing, plug in the drive power and data leads, note these are keyed. You can only put them in one way around. If you need to force it, you are probably wrong. Check and check again before doing up housing. The assembly varies but for the type shown there are two plastic runners that fit over the screw holes.
  5. Plug the external power block into the housing and switch on the power. Note; for small notebook drives the housing usually gets its power from the USB lead.
  6. Plug the USB lead into the housing.
  7. Power up your PC and login if you have not already done so.
  8. Plug the other end of the USB lead into your PC.
  9. Wait for your system to find the USB device. If using Microsoft Windows, check in My Computer, you should find the device listed as a removable drive. It will have a drive letter, for example your PC's harddisk is usually C: and the CD/DVD drive D: so it may be shown as E: (Remember when finished, before removing click the safe to remove drive icon on the task bar near the clock). If using SuSE Linux check My Computer, although you might get a screen pop up with the device listed.
  10. In My Computer open the drive to list its contents.
  11. Open a second Windows Explorer window to find the data you wish to copy from. In SuSE Linux click on the blue house icon or open a Konqueror window and browse the directories to the data to be copied.
  12. Copy the data to the external second drive

How to Back Up Your Computer Hard Drive

If your computer has ever suffered a computer virus or crashed unexpectedly, you may understand the importance of backing up your important computer data. If you have never performed this task, then read on to learn how to back up your computer hard drive. You will learn what the three things that you need to do to ensure that you never lose data again.

This How-To guide will show you how to use online backup and backup software to protect your data. This guide is intended for home users as well as small and medium sized businesses that do not have a dedicated IT department. Losing the data on your personal or business computer can be costly and can result in downtime for the company. Backing up that data will save the user unnecessary aggravation. This backup procedure will use free software wherever possible and strive to create a process that is easy to maintain.

The first step will illustrate how to create a clean starting point of your operating system. The second step shows how to backup your files locally onto a large USB disk drive. Finally, the last step makes sure important files are backed up online or on compact discs.

Friday, February 25, 2011

how to install windows operating system on mac ?

One of the huge advantages of getting an Apple computer with the Intel processor is the ability to run a native boot version of Windows. Lets face it, we still live in a Windows world no matter how much faster, safer, and more productive the Mac OS X operating system is.
But as Apple continues it’s rise in popularity, you can feel safe in making the switch to an Apple computer now because there really is nothing it can’t do. With the addition of Apple Boot Camp software, which now comes with the Leopard version of Mac OS X, you can easily setup Windows XP or even Vista as a dual boot system.
There are a few tips that I can give you to make this process go smoothly because even though it is easy to get everything setup, there are a couple of things in the setup guide that I didn’t bother to read first that caused problems.
The first step is to run the Boot Camp Assistant application. You can find this by going to Applications -> Utilities. Run through the steps in this wizard and create the partition for your Windows installation. When you finish, it will ask you to put your Windows installation disk in.  You will need to make sure you have a full installation disk, not an upgrade disk.  Also, if you are installing Windows XP then it has to be a SP2 install disk.
Put in the installation disk and restart. This will allow it to boot to the installation disk and start the Windows installation process. Go through the installation wizard to the partition selection page. At this page, select the Windows partition you created with the Boot Camp Assistant. On the format options, make sure you select the Full format FAT32 option. You cannot use the Quick format option or it will cause problems with finishing the installation.
After the Windows installation has finished copying the installation files to the hard drive and restarts, make sure you hold down the Option button so it gives you the option to boot into the Windows partition. If you do not do this, you’ll never complete the installation because it will just keep booting to the Mac OS partition.
Once you’ve completed the Windows installation, you’ll need to run the setup.exe program from the Leopard installation disk to let it finish setting up and installing the drivers to make all of the hardware function correctly in windows.
One last optional step to improve the access to your Windows OS is to buy and install Parallel’s Desktop 3.0 for Mac. This will give you the ability to run both operating systems at the same time as well as mirror and share files between the two operating system.

Thursday, February 24, 2011

how to send email using outlook ?

Write an E-Mail Message, Send It Now

E-mail addresses must be letter-perfect in order for your mail to reach the intended destination, and Outlook Express is rich with options for addressing messages accurately. You type a few letters of the person's name in the To or CC (for carbon copy) lines, and then Outlook Express automatically supplies the full address from your address book.
1.Click the Create Mail button.
Create Mail button
Create Mail button
2.In the To box, type the first few letters of your recipient's name as shown below. When Outlook Express proposes the name you want, press the Enter key.
If the name isn't in your address book, type the complete e-mail address. Capitalization doesn't matter, and there should be no spaces in the address.
3.Repeat step 2 for each person you want to send the message to, separating names with a comma or semi-colon.
4.To send copies of your e-mail, follow steps 2 and 3 above in the CC box as shown below for each person who will get a copy.
To and CC fields on a new mail message
5.Type a brief subject for your message as shown below.
Outlook Express will remind you if you forget this.
6.Click in the message area, and type your message as shown below.
7.Click Send as shown below.
If Outlook Express asks for confirmation of any name, click the correct name in the Check Names box, and click OK.
E-mail message subject and body, and Send button
TipProtect the privacy of your recipients' e-mail addresses. The polite way to send e-mail to a large group of people—a change of e-mail address, a joke, and so on—is to put the recipients' names in the BCC (blind carbon copy) line. Names and e-mail addresses in the BCC line are invisible to everyone who receives your message; when a recipient opens the message, only the sender's name appears (in the To line). If the BCC line isn't visible, on the View menu, click All Headers. Then follow the instructions in step 2 above to add names to the BCC line.

Write an E-Mail Message, Send It Later

You can compose e-mail while your computer is disconnected from the Internet.
Follow the steps in the Write an E-Mail Message, Send It Now section above.
When you click Send, Outlook Express lets you know that it's storing your message in the Outbox—it's in the Folder list—and then sends it automatically when you go online.
TipSave your e-mail. Outlook Express also automatically saves messages as you write them, so if your computer shuts down unexpectedly, your messages will be waiting for you in the Drafts folder. But for extra safety, it's not a bad idea—particularly for an important message—to save your e-mail message as you write. To do this, click Save, on the File menu.

Send an E-Mail Message in a Hurry

If Outlook Express doesn't send your e-mail messages as fast as you'd like, you can take matters into your own hands to speed them on their way.
Click the Send/Recv button.
Outlook Express immediately sends all messages in the Outbox (and retrieves any messages from the Internet service provider).
Send/Recv button on Outlook Express toolbar

Attach a File to an E-Mail Message

It's easy to attach files to e-mail—a picture of the new baby, the paper you're coauthoring, your tax file for the accountant, or a favorite song. It's rather like paper-clipping something to a letter.
1.In your message, click the Attach button.
Attach button on e-mail toolbar
2.Browse until you find the file you want to attach as shown below.
3.Click the file, and then click Attach as shown below.
If you want to enclose more than one file, repeat steps 1 through 3.
Attachment box
Attachment box
4.Finish the message if you haven't already, and click the Send button.
Attach field showing attached document
5.The attachments show up (!) here in the message.