Sunday, March 28, 2010

How to Upgrade a Processor

You can upgrade an older microprocessor to a newer one in easy steps. Before going ahead, you should gather information about which new CPU you need and whether your motherboard is compatible with it or not.
The compatibility of your new CPU with your motherboard can be ascertained by searching for specific information on the Internet, or checking with your trusted computer dealer.

Preparing to Upgrade to a New CPU

After purchasing the correct new CPU, make sure that adequate grounding is available before starting to replace the old CPU. To prevent damage to the fine circuits on the motherboard, wear a grounding strap attached to the computer’s chassis. This should be done several minutes before you get to work.
It is important to exercise extreme care when upgrading a CPU, because it is among the most fragile pieces of computer equipment.
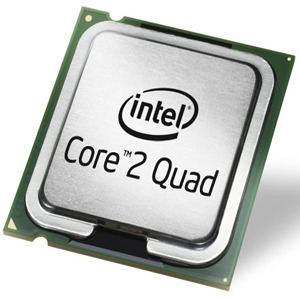
CPU2 How to Upgrade a CPU

Steps to Upgrade a CPU

  • Ensure that the power supply to the computer is turned off and all accessories are detached.
  • Remove the computer’s chassis cover carefully.
  • Locate the CPU fan and heatsink and disconnect the CPU fan from its power supply.
  • Remove the CPU’s heatsink on the motherboard, and find your computer's processor located below it.
  • Remove the old CPU by lifting up the tab holding it in place, and gently pulling it out.
  • The new CPU can be inserted by matching it correctly into position.
  • Push down the tab to hold the new CPU into position.
  • A thin, uniform layer of thermal compound should be applied before placing the heatsink back into position. This thermal compound is used to ensure improved conduction of heat from CPU to the heatsink.
  • The heatsink can then be reinstalled, and the fan's wire connected back to its power supply on the motherboard.
  • The next step will be to confirm that everything is properly connected, by gently trying to move the components.
  • When you are satisfied with the new installation, screw the computer's cover back into place. You can now remove the grounding wrist-strap.
  • Plug your computer into its power source, and attach all the accessories.
  • Your computer can now be turned on and should be ready for use!

Sunday, March 21, 2010

How to Change Mobile OS

Now that most mobile phones use operating systems in a similar way to desktop computers, you are more likely to want to change your OS. Typically you can change your mobile OS to a newer version of that OS, but some phone users have had experience changing the operating system entirely, rather than just the version. Note, however, that changing to an unofficial OS will likely void your warranty.

Instructions

  1. 1
    Upgrade the BB OS if you use a BlackBerry smart phone. BlackBerry's do not accept any other type of operating system, but Research in Motion (RIM) does upgrade the OS quite significantly with each release. OS 6 is the latest version (as of February 2011) and you can download it from the main BlackBerry website.
  2. 2
    Experiment if you have an iPhone. iPhones are typically the most closed-source mobile phones, but if you jailbreak your iPhone then you have many more possibilities. You can hack an iPhone to run Linux or early versions of Windows. This will be a complex process and will not be easy for a beginner.
  3. 3
    Upgrade your other OS using the relevant websites. Android releases new versions of their operating system as does Windows Phone (previously Windows Mobile). Windows Phone completely redesigns the user interface from earlier versions.

Sunday, March 14, 2010

How to partition and format a hard disk by using Windows XP Setup program

Microsoft Windows XP Professional Full Version with SP2
This article describes how to partition (prepare) and format a hard disk before you install Windows XP using the Windows XP Setup program. This article also contains things to consider before you partition or format your hard disk, and links to resources that can help you troubleshoot if problems occur. This article is intended for an advanced user. 

You can use other methods to partition and format the hard disk before you install Windows XP, such as the Fdisk and Format tools. For additional information about how to use Fdisk and Format to partition and format your hard disk, click the following article number to view the article in the Microsoft Knowledge Base:

255867  How to use the Fdisk tool and the Format tool to partition or to repartition a hard disk
If your computer is already running Windows XP, and you want to create partitions other than the System or the Startup partitions, you can use the Windows XP Disk Management tools. For additional information about how to use the Windows XP Disk Management tools to partition and format your hard disk, click the following article number to view the article in the Microsoft Knowledge Base:
309000  How to use Disk Management to configure basic disks in Windows XP

Before you partition and format the hard disk

Before you partition and format your hard disk, make sure that you do the following:

Prepare the hard disk according to the manufacturer's instructions

If you are using a SATA hard disk, skip this step and go to the "Determine the type of file system that you want to use" section. If you are using an IDE hard disk, set the jumpers and the cabling according to the role of the hard disk (for example, master or subordinate) and make any required BIOS (or CMOS) changes. To set the jumpers and cabling, and make any required BIOS or CMOS changes, see the documentation that was included with your hard disk and motherboard, or contact the manufacturers.

Determine the type of file system that you want to use

You can use either the NTFS or FAT file systems. NTFS is the preferred file system to format the hard disk unless you want to run an earlier version of Windows that cannot read NTFS partitions. For additional information about the differences between the FAT and NTFS file systems, click the following article numbers to view the articles in the Microsoft Knowledge Base:
100108  Overview of FAT, HPFS, and NTFS file systems
310525  Description of the FAT32 file system in Windows XP

If the hard disk already contains data, back it up

Make sure that you back up all your important data before you continue. When you partition and format a hard disk, all the data on that partition is permanently deleted. You can view current partition information without deleting your data. For additional information about how to use the backup utility or the Files and Settings Transfer Wizard, click the following article numbers to view the articles in the Microsoft Knowledge Base:
320820  How to use the Backup utility to back up files and folders in Windows XP Home Edition
309340  How to use Backup to restore files and folders on your computer in Windows XP
293118  How to use the Files and Settings Transfer Wizard
306186  How to use the Files and Settings Transfer Wizard from CD-ROM
306187  How to use the Files and Settings Transfer Wizard Disk in Windows XP

If the hard disk has a drive overlay or a disk management program, make sure that it is compatible

If your computer uses drive overlay software for large hard disk support, do not use the Windows XP Setup program to partition or to format the drive until you have verified that Windows XP is compatible with the software. If you have drive overlay software installed, contact the software manufacturer to find out whether it is compatible with Windows XP. If you are not sure whether you have drive overlay software installed, contact the manufacturer of your hard disk drive or motherboard.

If you have software that you want to reinstall, verify that you have the disks

Make sure that you have the original CDs or floppy disks so that you can reinstall the software programs after you partition and format your drive. If you purchased an upgrade for a program, make sure that you have the full version of the original program. Many upgrades for programs require a compliance check before you can install the upgraded product. If you cannot find the original CDs or floppy disks, contact the software manufacturer before you continue.

If you have updated device drivers for peripheral devices, back them up

If you have installed an updated device driver for your peripheral devices (for example, modems and printers), make sure that you back up the new driver for the device to a location other than the drive that you want to format and partition so that you can reinstall it after you install your operating system.

Configure your computer to start from the CD or DVD drive

To start your computer from the Windows XP CD, your computer must be configured to start from the CD or DVD drive. In some cases, you may have to modify your computer's BIOS settings to set this configuration. For information about how to configure your computer to start from the CD or DVD drive, see the documentation that is included with your computer, or contact the computer manufacturer.

If you have a computer that cannot start from the CD or DVD drive and you need to start your computer from the startup disk, make sure that you have the floppy setup disks so that you can run the Setup program from the floppy disk drive. 

Note You can obtain Windows XP Setup boot disks from Microsoft, but only by download. We provide the Setup boot disks so that you can run the Setup program on computers that cannot use a bootable CD-ROM. If you can start your computer from a CD-ROM or from a network-based installation, we strongly recommend that you use those installation methods instead. Future products will no longer support installation by using the Setup boot disks.

How to partition and format the hard disk using the Windows XP Setup program

You can use the Windows XP Setup program to partition and format the hard disk. To do this, use the following steps:

Step 1: Partition the hard disk

  1. Insert the Windows XP CD into your CD or DVD drive, or insert the first Windows XP Setup disk into the floppy disk drive, and then restart the computer to start the Windows XP Setup program.

    Note If you are using the Windows XP Setup disks, insert each additional disk when you are prompted, and then press ENTER to continue after you insert each disk.
  2. If you are prompted, select any options that are required to start the computer from the CD or DVD drive.
  3. If your hard disk controller requires a third-party original equipment manufacturer (OEM) driver, press F6 to specify the driver. For more information about how to use F6 to supply a third-party OEM device driver while the Windows Setup program is running, click the following article number to view the article in the Microsoft Knowledge Base:
    314859  Limited OEM driver support is available with F6 during Windows XP Setup
  4. At the Welcome to Setup page, press ENTER. 

    Note If you are using the Setup disks (six bootable disks), the setup prompts you to insert the Windows XP CD.
  5. Press F8 to accept the Windows XP Licensing Agreement.
  6. If an existing Windows XP installation is detected, you are prompted to repair it. To bypass the repair, press ESC.
  7. All existing partitions and non-partitioned spaces are listed for each physical hard disk. Use the ARROW keys to select an existing partition, or create a new partition by selecting the non-partitioned space where you want to create a new partition. You can also press C to create a new partition using non-partitioned space. 

    Note If you want to create a partition where one or more partitions already exist, you must first delete the existing partition or partitions, and then create the new partition. You can press D to delete an existing partition, and then press L (or press ENTER, and then press L if it is the System partition) to confirm that you want to delete the partition. Repeat this step for each existing partition that you want to include in the new partition. When all the partitions are deleted, select the remaining non-partitioned space, and then press C to create the new partition.
  8. To create the partition with the maximum size, press ENTER. To specify the partition size, type the size in megabytes (MB) for the new partition, and then press ENTER.
  9. If you want to create additional partitions, repeat steps g. and h.
  10. To format the partition and install Windows XP, go to step 2. 

    If you do not want to install Windows XP, press F3 two times to exit the Windows Setup program, and then do not follow the remaining steps in this article. 

    To format the partition without installing Windows XP, use a different utility.

Step 2: Format the hard disk and install Windows XP

  1. Use the ARROW keys to select the partition where you want to install Windows XP, and then press ENTER.
  2. Select the format option that you want to use to format the partition. You can select from the following options:
    • Format the partition by using the NTFS file system (Quick)
    • Format the partition by using the FAT file system (Quick)
    • Format the partition by using the NTFS file system
    • Format the partition by using the FAT file system
    • Leave the current file system intact (no changes)
    Notes
    • If the selected partition is a new partition, the option to leave the current file system intact is not available.
    • If the selected partition is larger than 32 gigabytes (GB), the FAT file system option is not available.
    • If the selected partition is larger than 2 GB, the Windows Setup program uses the FAT32 file system (you must press ENTER to confirm).
    • If the partition is smaller than 2 GB, the Windows Setup program uses the FAT16 file system.
    • If you deleted and created a new System partition, but you are installing Windows XP on a different partition, you are prompted to select a file system for both the System and Startup partitions.
  3. Press ENTER.
  4. After the Windows Setup program formats the partition, follow the instructions that appear on the screen to install Windows XP. After the Windows Setup program is finished and you have restarted the computer, you can use the Disk Management tools in Windows XP to create or format more partitions. For additional information about how to use the Windows XP Disk Management tools to partition and format your hard disk, click the following article number to view the article in the Microsoft Knowledge Base:
    309000  How to use Disk Management to configure basic disks in Windows XP

Additional notes

Before you can install an operating system such as Windows XP, you must first create a primary partition on the first physical hard disk (Disk 0) on your computer. Then, you can format a file system on that partition to create what is called the System partition. 

Or, you can create a separate partition for the operating system on any physical hard disk. This is known as the Startup partition. The System partition on Disk 0 can also be used as a Startup partition.

Monday, March 1, 2010

How to Unzip a File or Folder With Winzip

Winzip "Unzip" Tutorial
In this tutorial we will learn how to "unzip" a zip file using the winzip program.
You can download a free copy of the Winzip program here.
  • Find the .zip file you want unzipped within your Windows Explorer Files.

  • Highlight the .zip file.

  • Double click on the .zip file.

  • The winzip program will automatically open.

  • Click "I Agree"


  • Highlight the file/s and click "Extract"


  • Select the folder where you wish to place the file/s and click "Extract"


  • The Winzip program will unzip the chosen file/s into your selected folder.
    When the green light shows at the bottom, the program is finished and you can close the Winzip Program.