Follow the instructions
- Position the 3D viewer to contain the spot you want to placemark. Consider zooming into the best viewing level for the desired location. Choose any one of the following methods:
- Select Placemark from the 'Add' Menu.
- Click the Placemark icon on the toolbar menu at the the top of the screen

The 'New Placemark' dialog box appears and a 'New Placemark' icon is centered in the viewer inside a flashing yellow square. Position the placemark. To do this, position the cursor on the placemark until the cursor changes to a pointing finger and drag it to the desired location. The cursor changes to a finger pointing icon to indicate that you can move the placemark. 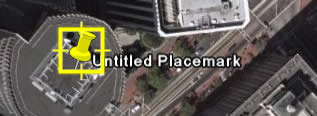 You can also lock the placemark position or set advanced coordinates for its position. Set the following properties for the new placemark:
 - Name for the placemark
- Description, including HTML text (see Writing Descriptions)
- Style, Color - Choose a color, scale (size) and opacity for the placemark icon
- View - Choose a position for the placemark. For explanation of terms in this tab, mouse over each field. Click Snapshot current view to apply the current view (altitude and camera angle) to this placemark.
- Altitude - Choose the height of the placemark as it appears over terrain with a numeric value or the slider. Choose 'Extend to ground' to show the placemark attached to a line anchored to the ground.
- (Icon) - Click the icon for the placemark (top right corner of the dialog box) to choose an alternate icon.
To learn more about editing properties for your placemark, see Repositioning Placemark
- Click OK to apply the information you entered in the placemark dialog box.
Your placemark appears in the 3D viewer and as an entry in the selected folder. Once you save this placemark, you can always change its position and properties. See Editing Places and Folder for more information.


